Use in Transcription
Once your model's training status is Success, it's selectable when you upload a new file from the dashboard.
Open the Upload Flow
- Go to the dashboard (the workspace home).
- Click the Create button in the workspace (blue, with a + icon).
- Pick Transcript or Subtitles from the menu. (The third option, Force Alignment, also exposes the same language dropdown - use it when you have audio + a plain-text transcript and want timestamps added.)
- The Upload modal opens.
Pick the Custom Model
On the right side of the modal is a Select language label with a dropdown below it. Open the dropdown - your trained custom model appears alongside the built-in languages.
Custom models are flagged as private on the server, so each entry is rendered with:
- The label
<your model name> (<key>) - An orange lock icon on the left (built-in languages show a green globe icon instead)
Select your model and continue the upload as usual.
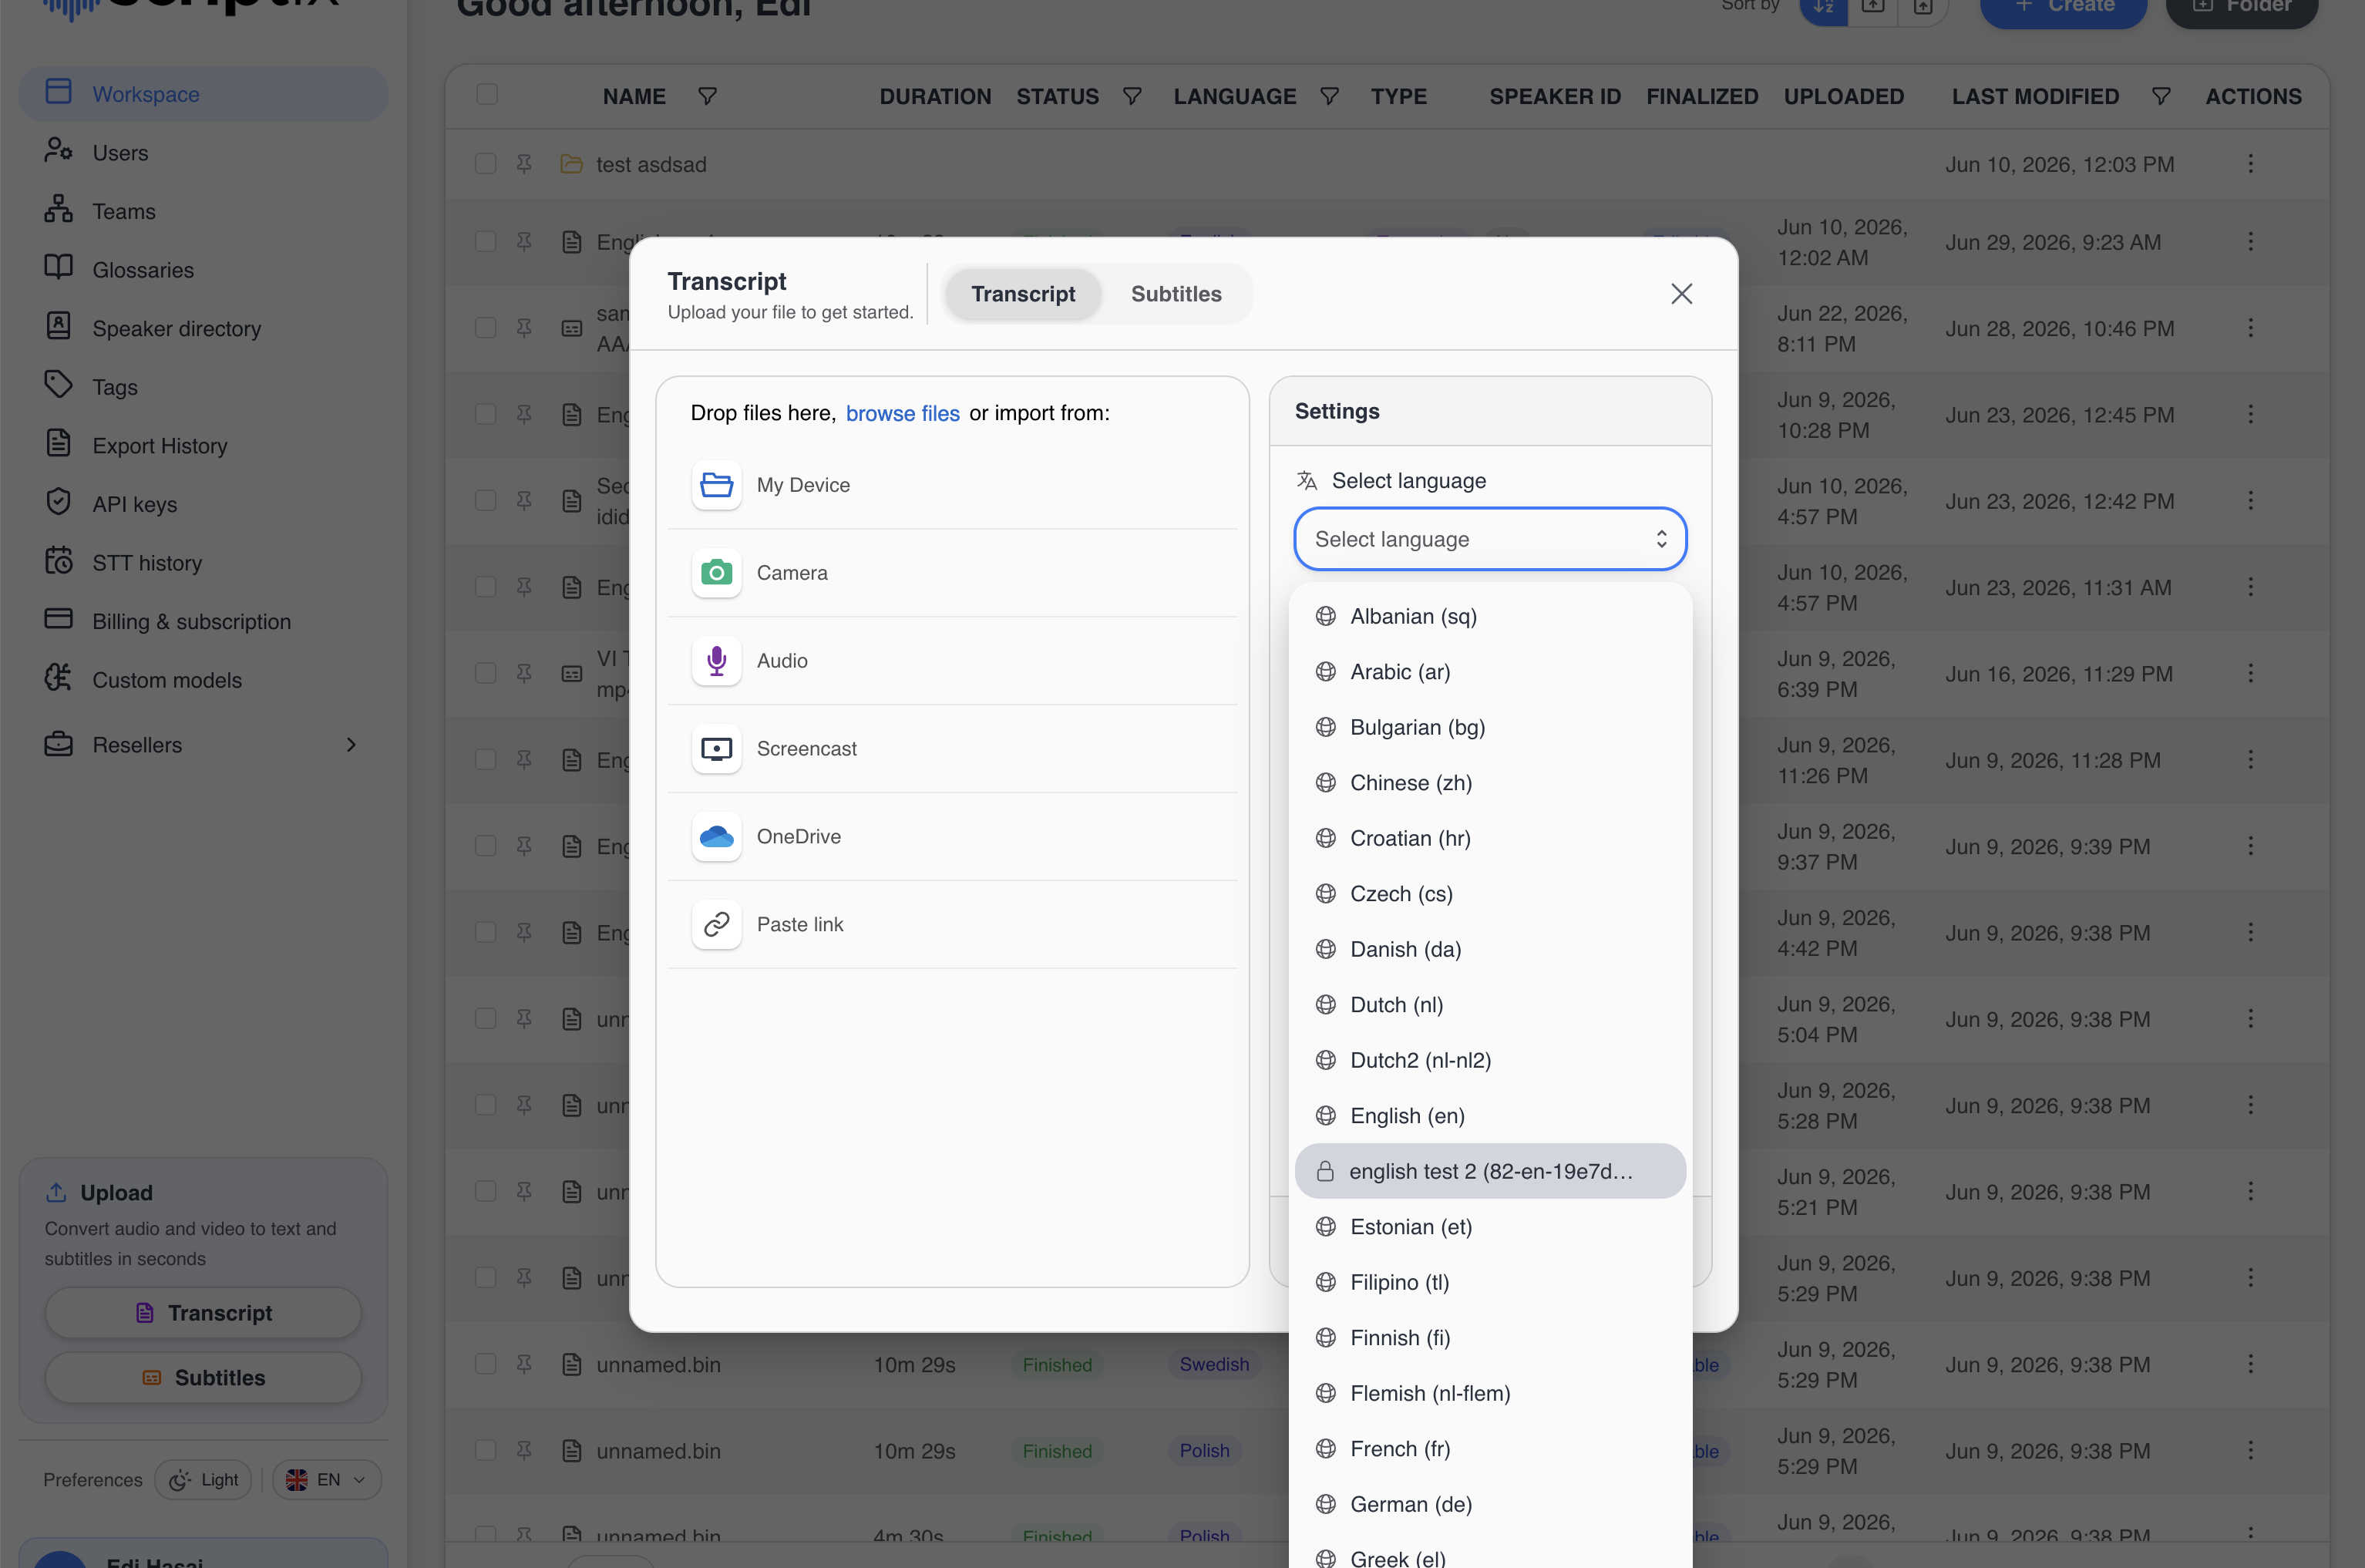 The language dropdown opened - custom models appear with a lock icon next to the name.
Where Else the Dropdown Appears
The same Create → Transcript / Subtitles / Force Alignment menu - and therefore the same language dropdown - is available from inside folders and from the workspace's new project action, not only from the dashboard root.
If You Don't See Your Model
The language list is loaded when the upload modal opens. If you just finished training, close and re-open the modal so the list refetches. Models that are not at status Success are not selectable.
Next Steps
- Training Process - if the model isn't trained yet.
- Glossaries - keep terms consistent when translating your transcripts.