What Are Custom Models?
A custom model is a language model trained on your own audio + transcripts so the speech recogniser gets better at the words, names and phrases that matter to your work.
It's built on top of a Scriptix base language model (one of the trainable languages). After training, it appears as an extra option in the language dropdown on the upload screen - pick it instead of the plain base language and the transcription uses your trained model.
The Four Steps
- Create - name the model and pick a trainable base language.
- Upload datasets - your audio files and matching transcripts.
- Train - Scriptix validates the data and runs the training job.
- Use - once status is Success, select the model in the upload language dropdown.
Finding Custom Models
Open Custom Models from the left sidebar (brain icon). The route is /custom-models.
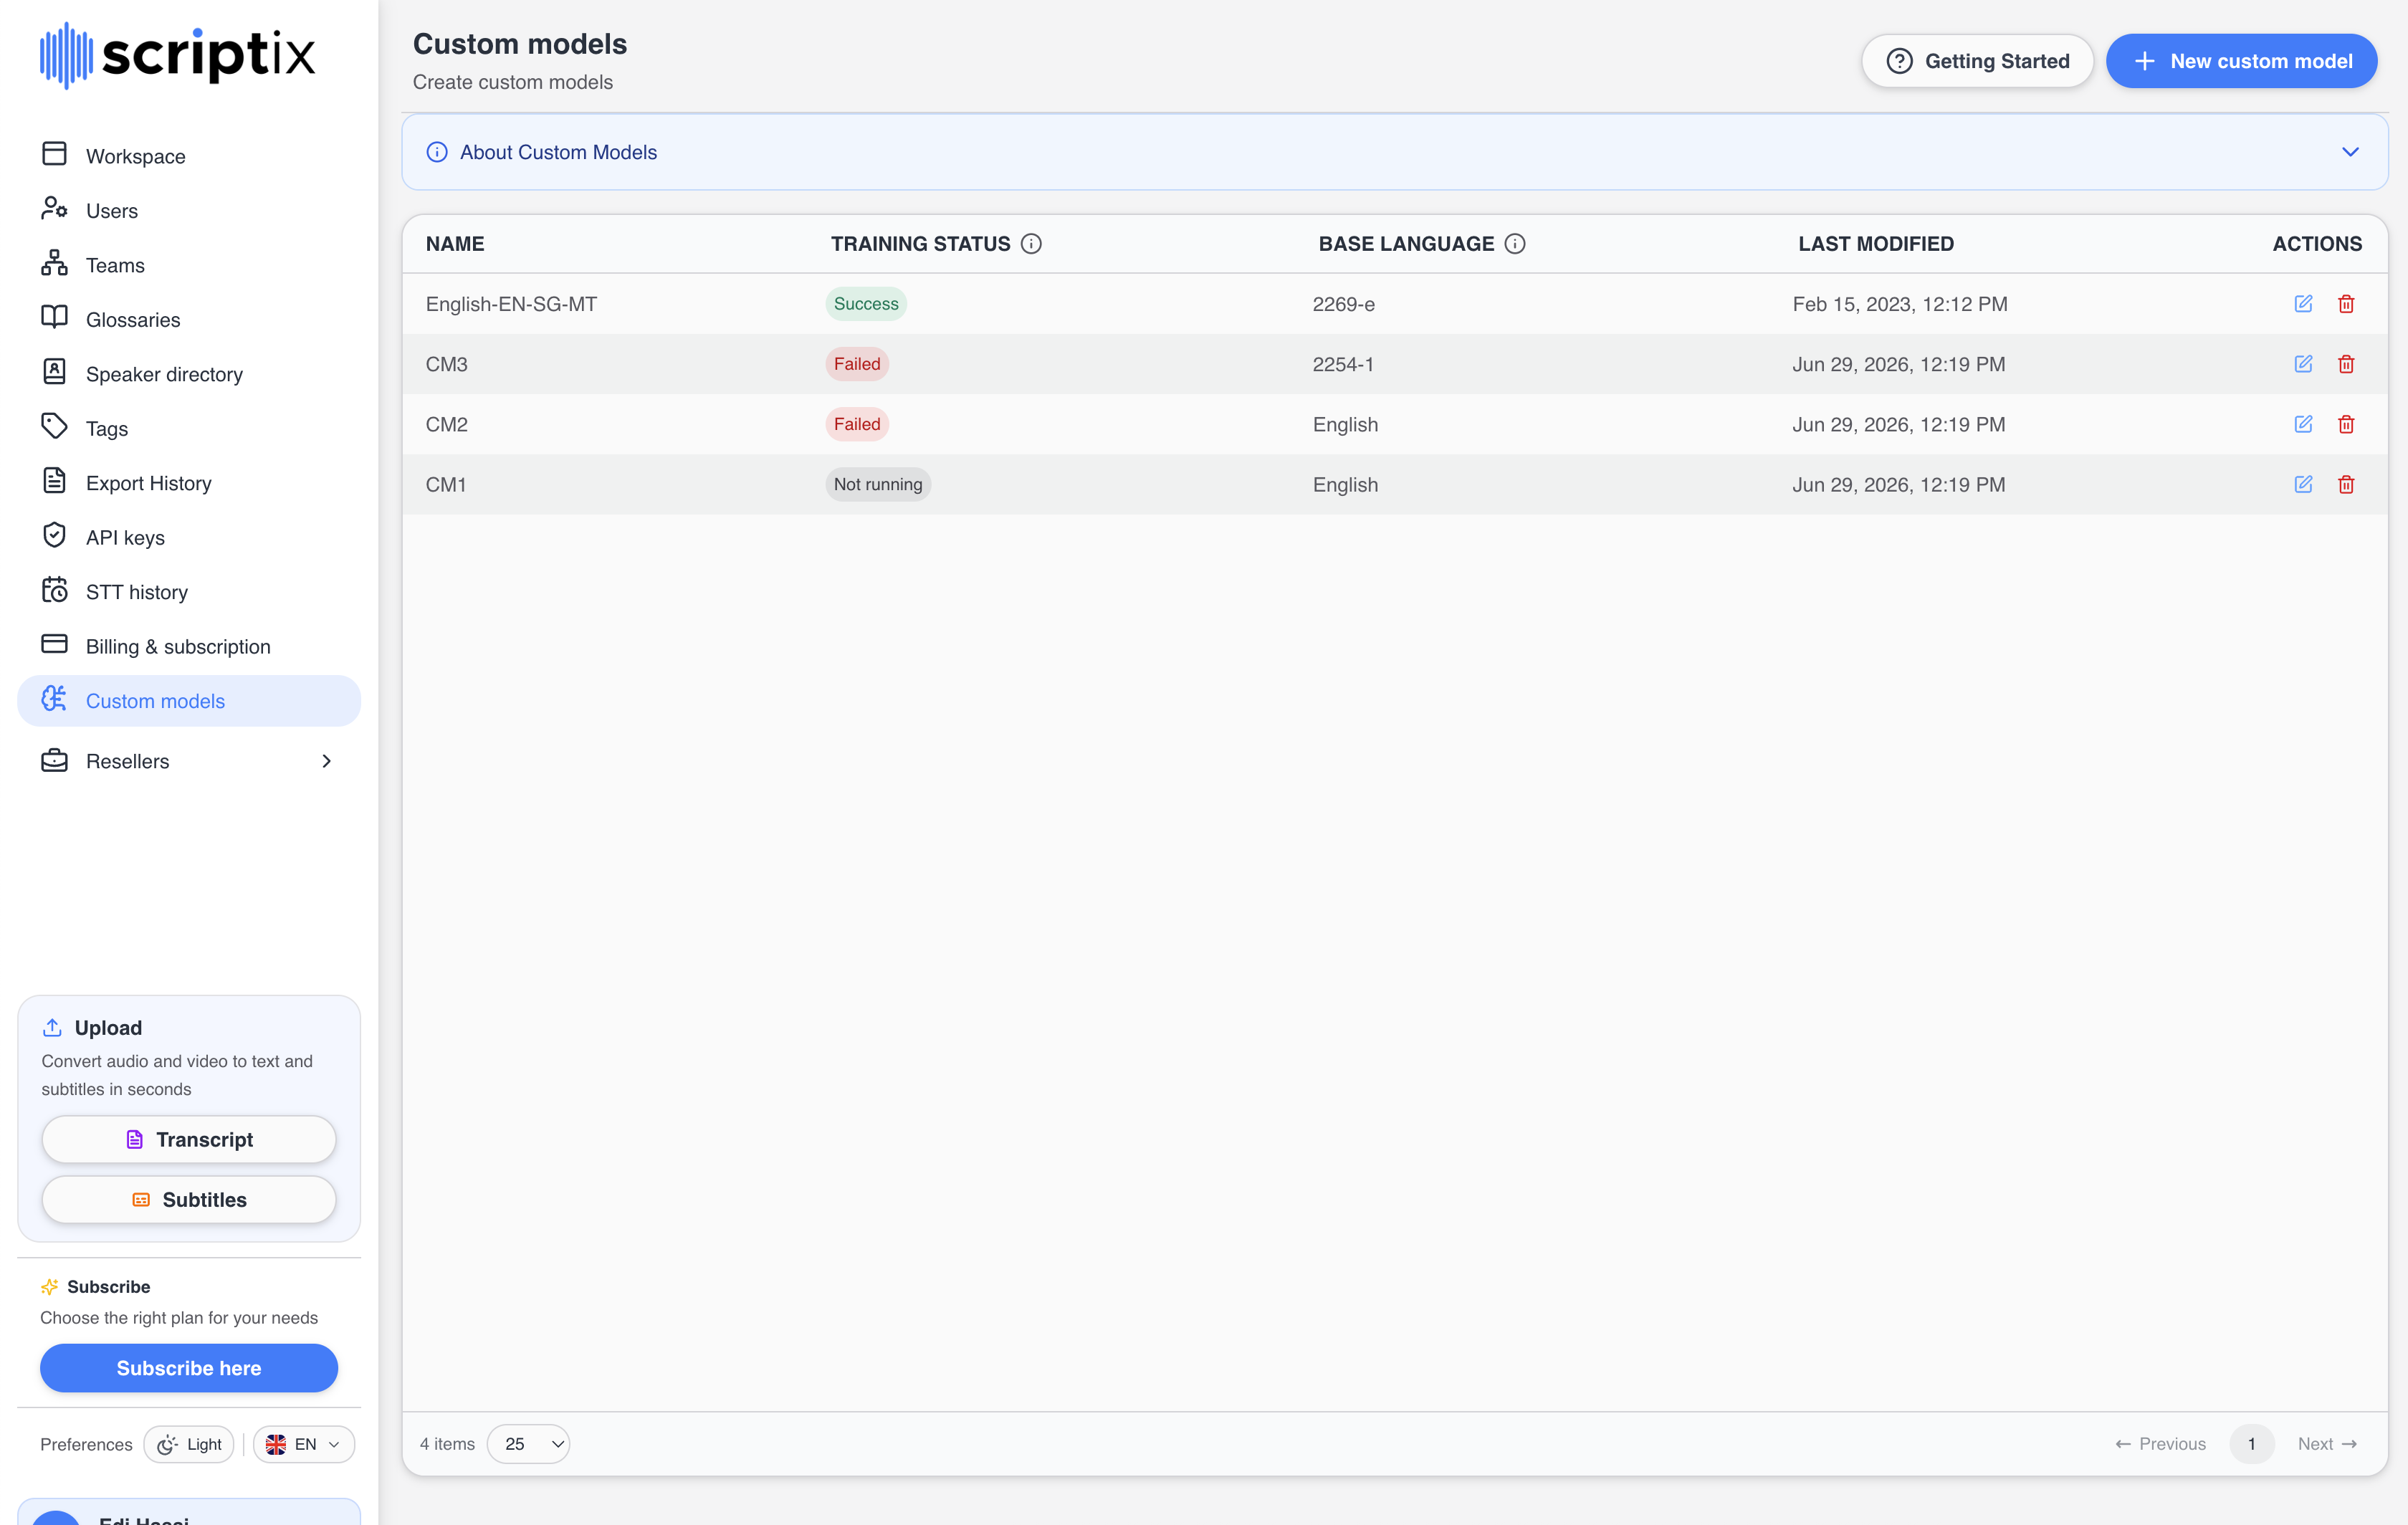 Sidebar - the Custom Models entry.
The Custom Models Page
The page has:
- A header with two buttons: Getting Started (re-opens the in-app guide) and New custom model.
- An About Custom Models info banner with a short description and a link back to the dashboard to use Force Alignment.
- A table of your models with these columns: Name, Training status (a coloured badge, see below), Base language, and Last modified.
- A row menu with Edit and Delete actions.
The list auto-refreshes every 20 seconds, so you can leave it open while a model trains. If you have no models yet, use New custom model in the header to create your first one.
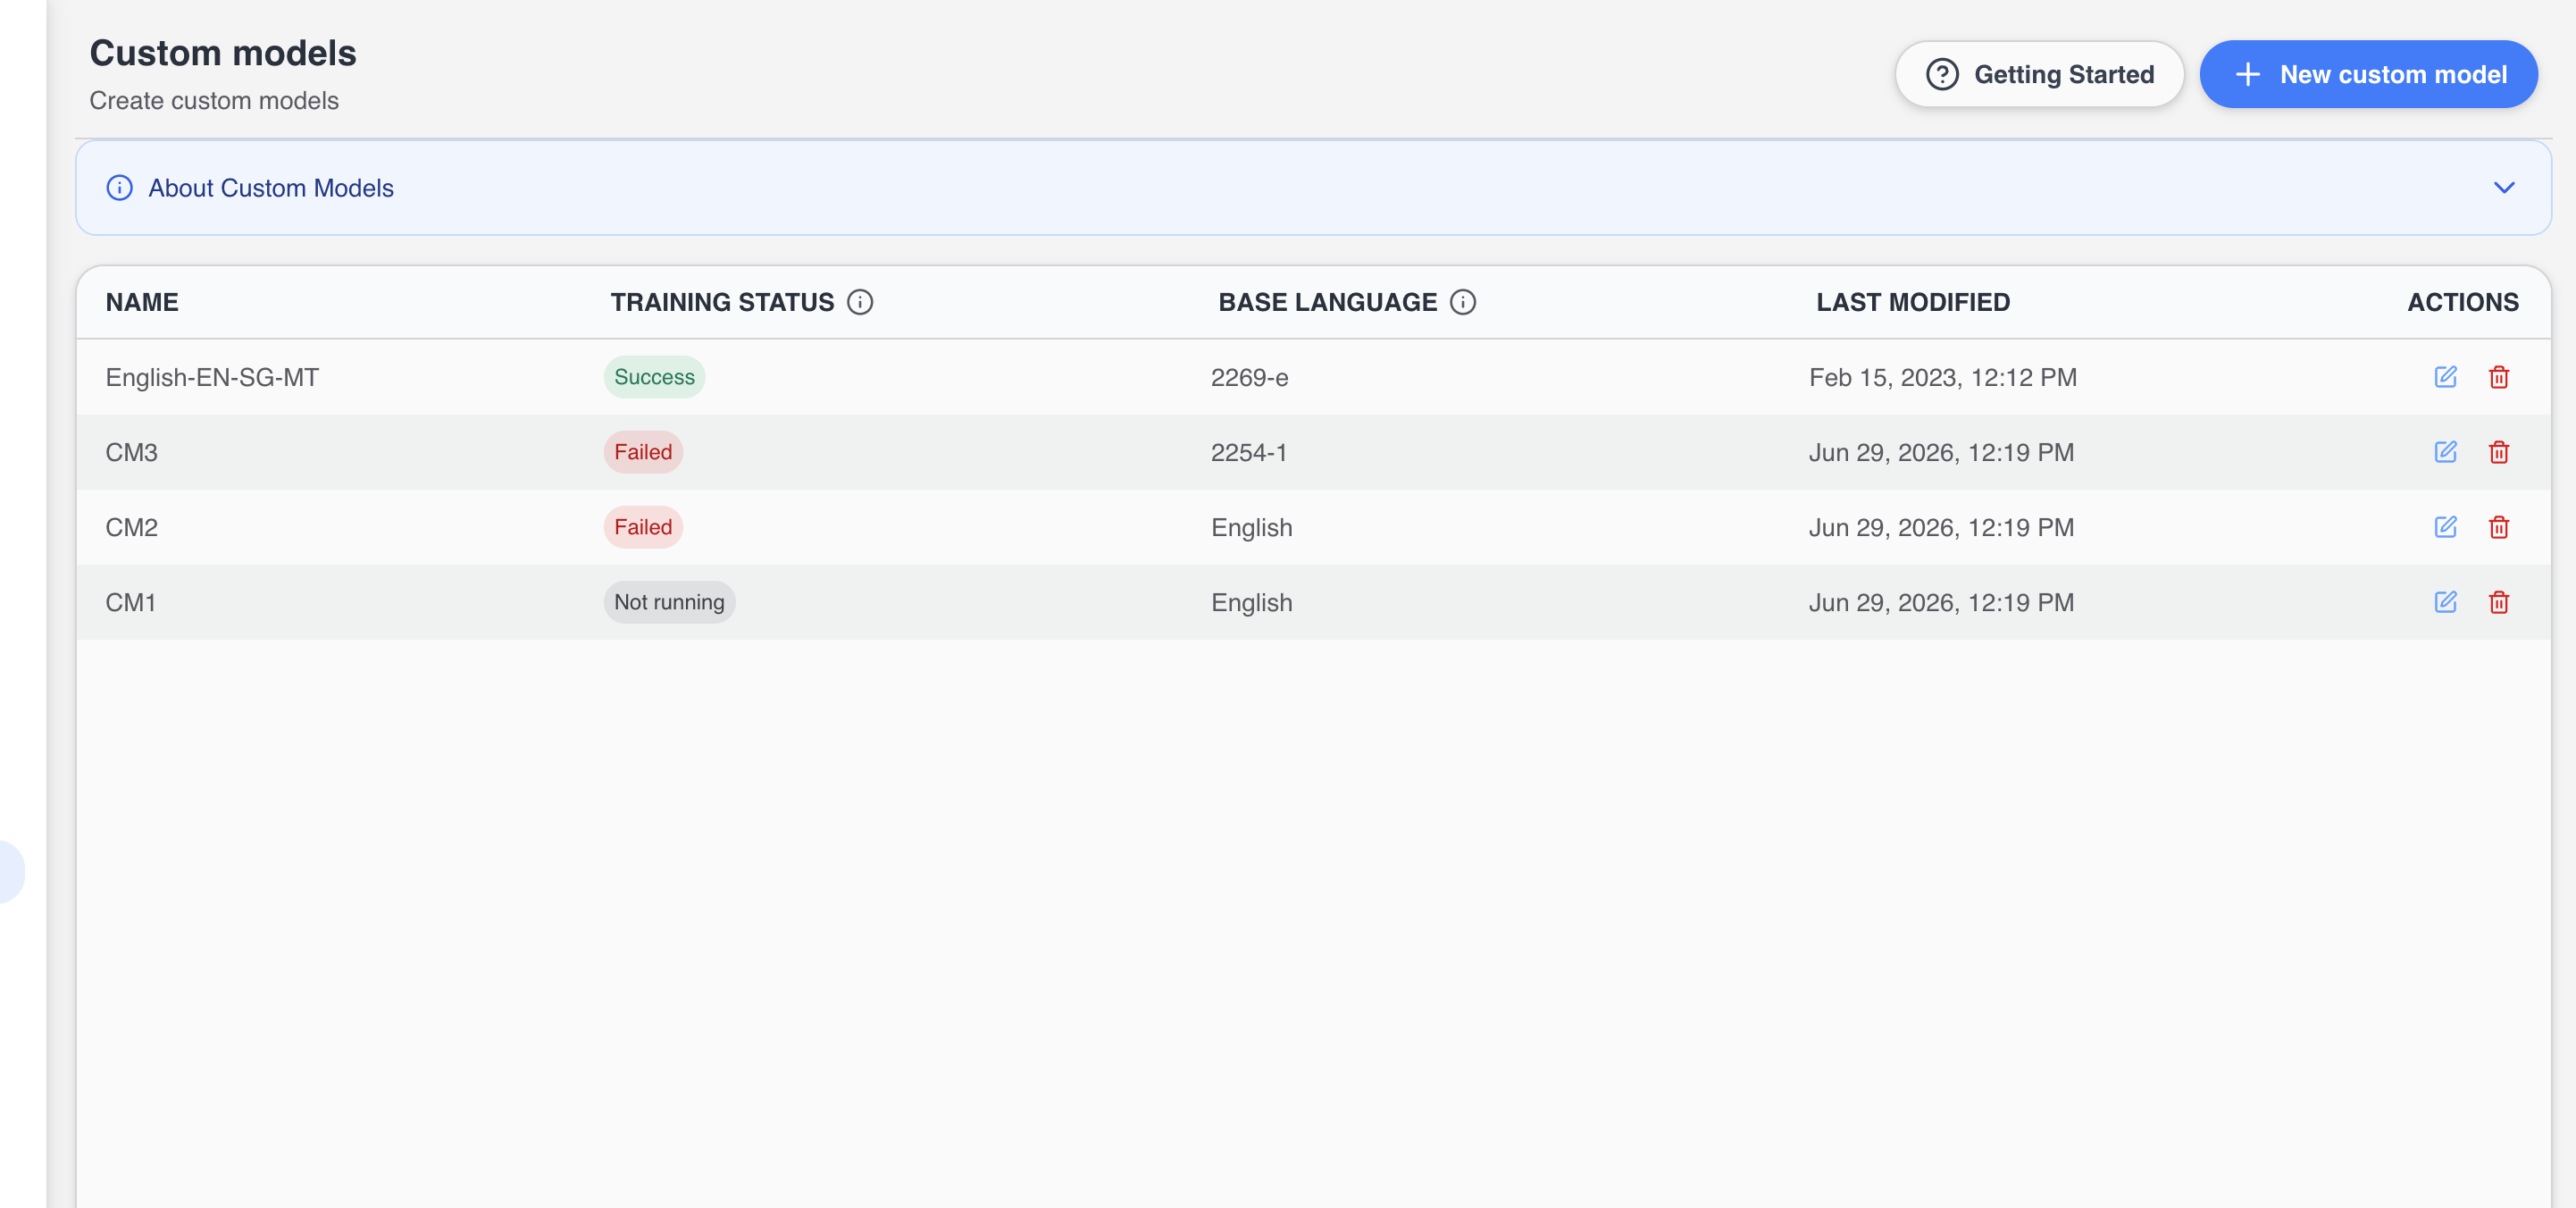 Header buttons, info banner and the models table.
Training Statuses
Every model is in one of five states:
| # | Status | Badge | Meaning |
|---|---|---|---|
| 1 | Not running | grey | No training started yet (or you can start a new one). |
| 2 | Ready to run | amber | Queued, will begin shortly. |
| 3 | Running | sky blue | Training in progress. |
| 4 | Success | green | Trained and selectable on uploads. |
| 5 | Failed | red | Something went wrong; you can retry from this state. |
The Train the language button only appears for statuses 1 and 5. While the model is in 2, 3 or 4 it is hidden.
The In-App Guide
The first time you open /custom-models, the Getting Started with Custom Models modal opens automatically. It only opens automatically once per browser, but you can re-open it any time from the Getting Started button in the page header.
 The four-section in-app guide: what custom models are, what data you need, what to do if you only have audio (Force Alignment), and what happens after training.
Custom Models vs Glossaries
Both help with domain-specific vocabulary, but they work at different stages:
- Custom models retrain the speech recogniser itself, improving how your audio is transcribed. Best for ongoing, larger-scale work where you have audio and matching transcripts to learn from.
- Glossaries define source to target term pairs that are applied during translation, keeping specific terms consistent when a transcript is translated. No training or audio needed.
Custom models affect transcription; glossaries affect translation. You can use both.
Quick Reference
- Find it: sidebar -> Custom Models (brain icon).
- Create: header -> New custom model -> name + trainable language.
- Add data: open the model -> New dataset -> pick up to 10 files -> Create.
- Train: model details -> Train the language -> confirm. The button only appears for Not running or Failed statuses.
- Use it: after status reaches Success, pick the model from the language dropdown when uploading.
- Rename: edit the Name field on the details page -> Update.
- Delete: row menu -> Delete -> confirm.
Next Steps
- When to Use Custom Models - pick the right tool for your case
- Create Custom Model - step by step
- Training Process - uploading datasets and running training
- Use in Transcription - picking the trained model on upload